Users
Add, remove, and manage users, link them to their connected service accounts, and control per-user sync.

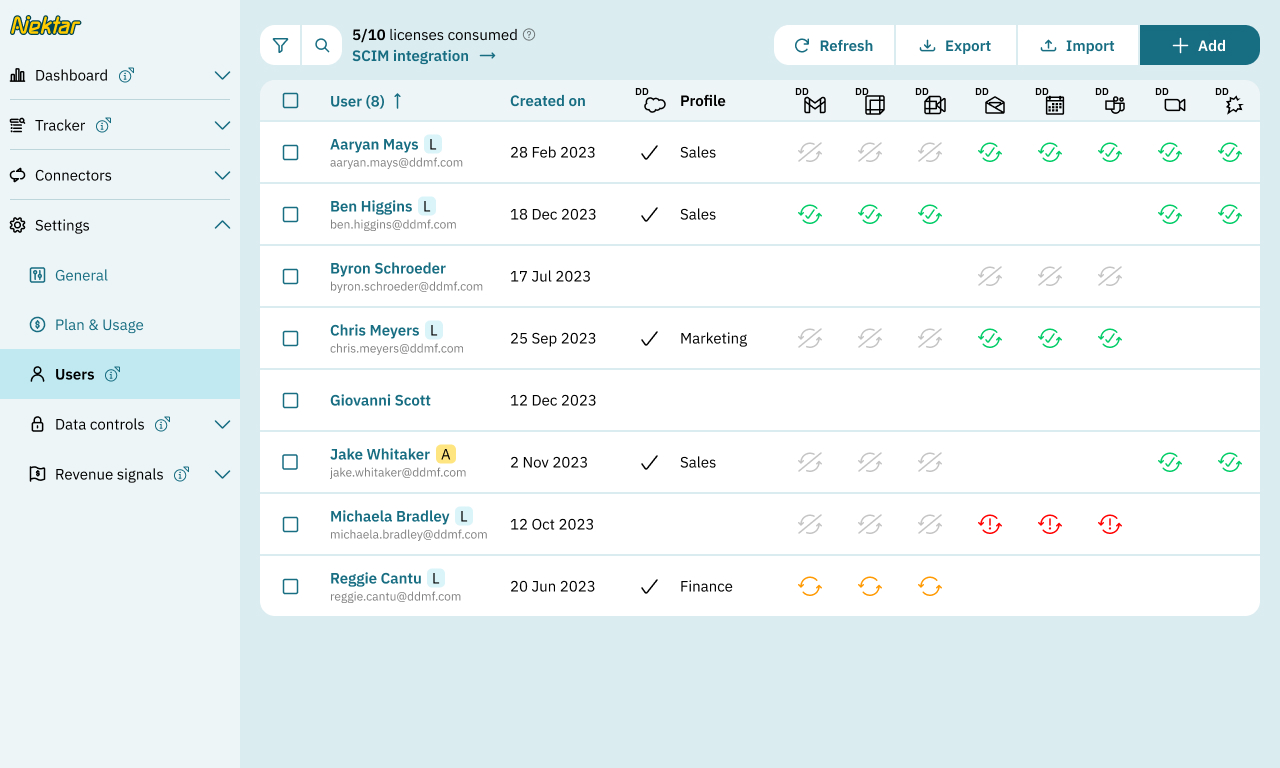
User management lets you add and remove users, monitor license consumption, link each user to their accounts on integrated services and monitor and control user-level sync.
It shows users that have already been added to Nektar. It can be filtered using name and email address. It can be sorted based on name and created on date.
You may click the name or the row of a user to view and update details.
List view
Integration icons
These icons indicate this user’s status within each connector in your organization.
For connectors without user-level sync (such as Salesforce), a check mark is shown if the user is linked to a user account on that service.
For connectors with user-level sync (such as Google, Microsoft and Zoom), a sync health icon is shown for every object (emails, events). This icon can be clicked for more information and to toggle sync on or off. Sync health icons may indicate the following states:
 |
Disabled | Can be enabled on the same screen |
|---|---|---|
 |
Not started | Disabled globally, or pending approval |
 |
In progress | Actively syncing; some data is remaining |
 |
Completed | Everything synced; watching for new data |
 |
Delayed | Sync has not run in the last 30 minutes |
 |
Stalled | Stopped due to error or hasn’t run in 2 hours |
Add a user
There are two ways to add users to Nektar — individually or in bulk.
Add individually
You can manually add a user by clicking the “Add New User” button on the Users page in your Nektar Console. This option is ideal when you only need to onboard one or a few users.
When you click “Add New User”, a user setup form will appear. In this form, you can:
- Select the user from the dropdown under each connector (for example, Google, Microsoft or Zoom).
- Enable or disable the relevant syncs for that user.
- Turn on the Admin toggle if you want to grant admin privileges.
Once you’ve configured the user settings, click “Save”. The new user will now appear in your user list.
Import in bulk
If you need to add several users at once, use the “Import Users” option. This allows you to upload all user details in one go using a CSV file.
When you click “Import Users”, you’ll see an option to download a CSV template. Use this file to prepare your user list by including:
- User Name
- Email addresses for different connectors you want to enable in Nektar
- Whether the user should have Admin Access
After filling in the CSV, save the file and upload it back into the console. If there are any errors in your file, a pop-up window will highlight them so you can make corrections and re-upload. Once the upload is successful, the new users will appear under the Users page. From there, you can manage permissions or make further edits as needed.
Export Users
The Export Users option allows you to download a list of all users from your Nektar Console in a CSV format. This will contain user details, such as connector information, sync preferences, and admin access levels.
To export users:
- Go to the Users section in your Nektar Console.
- Click the “Export Users” button.
- A CSV file containing all user information will automatically download to your system.
Bulk actions
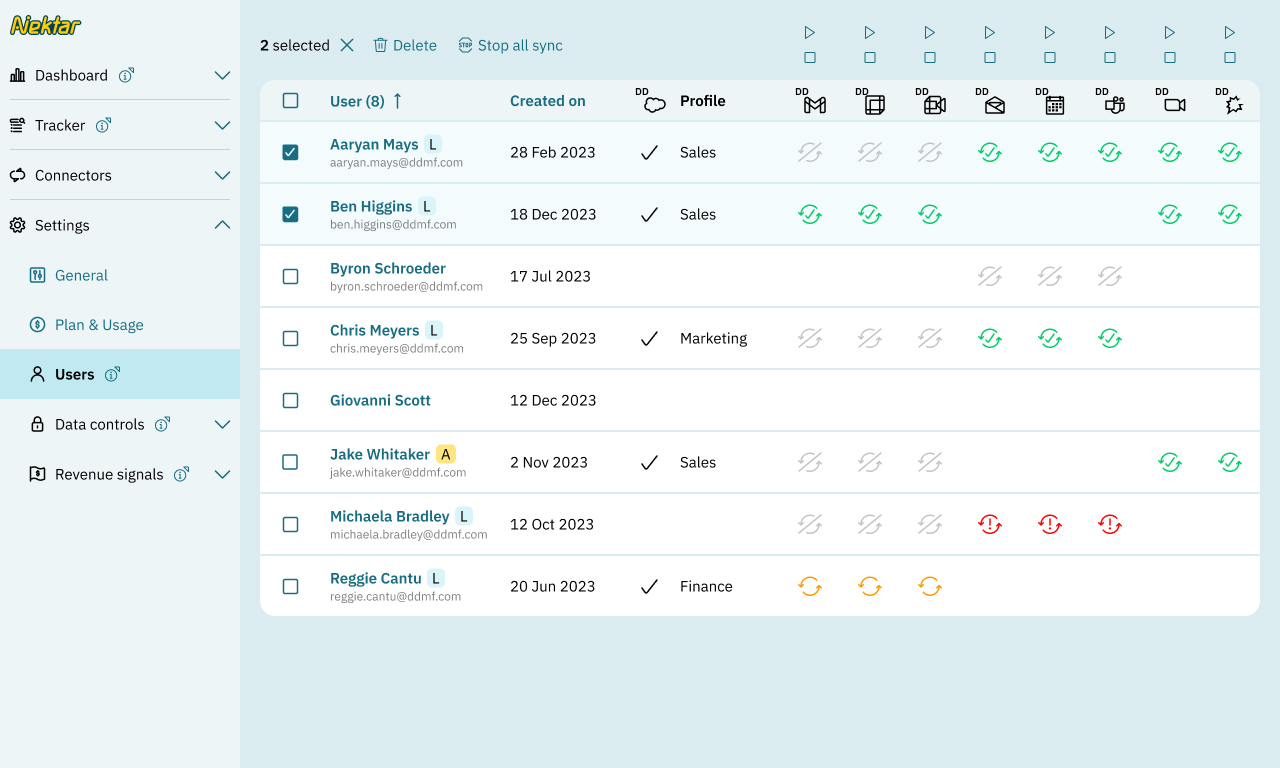
You may select one or more users with the checkboxes at the start of each row. This displays buttons on the top row of the page for actions applicable to your selection, such as enabling and disabling a particular sync or deleting these users.
Edit view
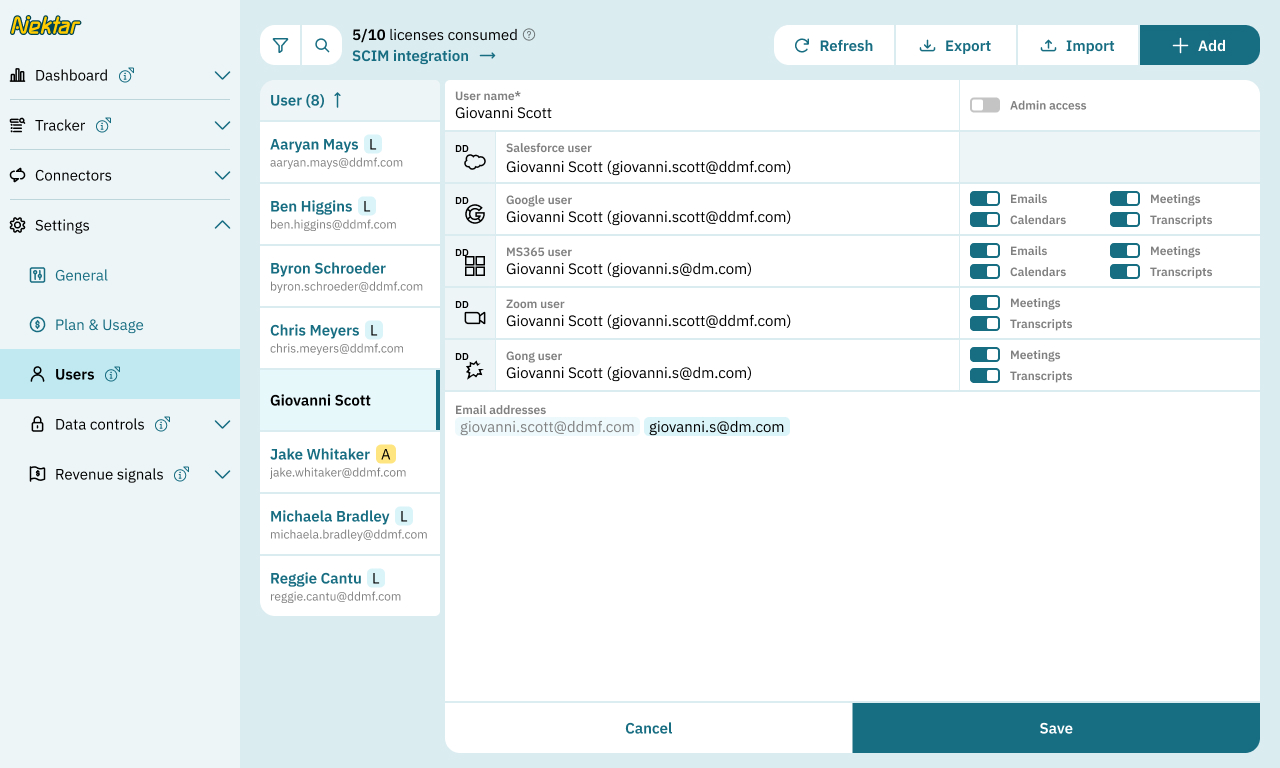
In the user editing form, you can add or modify user’s email address, enable/disable different connectors, start/stop sync or make a person admin.
In the user editing screen, you may update:
- The name displayed in user management
- This user’s Salesforce, MS365, Google and/or Zoom user accounts.
- This user’s email addresses.
Nektar uses these linked external user accounts and email addresses to determine which user participated in a particular external communication.
Connectors
You can add the email address of a user under each connector you wish Nektar to read data from.
Sync toggles
These toggles let you control what data Nektar should sync for a user under a specific connector.
Admin
This toggle lets you add and remove Nektar administrators. Nektar administrators have full access to the Nektar console — add or remove users, manage connectors and start or stop sync.
Note that:
- All admins can add or remove other admins.
- Admins need to have a Salesforce account.